


Here is the NBA 2K21 Badges & Takeover Guide & Analysis, for both Next-Gen (Xbox Series X, PS5) on Page 1 and Current-Gen (Xbox One, PS4, Switch, PC) on Page 2.
Also See:
How to Unlock Badges
Badges are organized by the categories of Finishing, Shooting, Playmaking, and Defense/Rebounding. You unlock badges by building up badge points in each skill via your in-game performance related to that skill. For example, getting assists will build up points for Playmaking, getting steals and blocks will build up points for Defense / Rebounding, etc. After getting enough badge points for a skill, you’ll be able to choose from one of that skill’s badge.
There are also minimum attribute requirements to unlock a badge – which are included in this Badges guide. Some requirements may vary and depend on build, position, and in some cases, overall rating.
(Also see: NBA 2K21 Next-Gen MyPLAYER Builder Tool)
Click on any of the individual badges to get the full NBA 2K21 Badges breakdown and analysis! This includes a list of best builds for each badge, badge tips which explain the difference between badges, badge info, and more.
NBA 2K21 Next-Gen Badges & Takeover Guide & Analysis
Finishing Badges | Shooting Badges | Playmaking Badges | Defense / Rebounding Badges | Takeover
(* = New Next-Gen Badge)
Finishing Badges
ACROBAT – Boosts the ability to hit high degree of difficulty layups. Spin, half-spin, hop step, euro-step, cradle, reverse and change shot layup attempts receive a significant boost.
Requirements: Driving Layup 71 (GOLD) 91 (HOF)
BACKDOWN PUNISHER – Increases the chances of a player successfully backing down their opponent. Allows players to have more success than normal when backing down a defender in the paint.
Requirements: Post Control or Strength 65 (GOLD) 83 (HOF) or OVR 97
DREAM SHAKE – Raises the chances that a defender bites when doing fakes in the post. Post move fakes have a higher chance of stunning a defender. Also, shot attempts following post moves and shot fakes have an increased shot percentage.
Requirements: Post Control 52 (GOLD) 67 (HOF) or 96 OVR
DROPSTEPPER – Improves a player’s ability to effectively use dropsteps in the post. Allows for more success when attempting post dropsteps and hop steps, in addition to protecting the ball better while performing these moves in the post.
Requirements: Post Control 62 (GOLD) 79 (HOF)
FEARLESS FINISHER * – Improves a player’s ability to convert contact layups.
Strengthens a player’s ability to absorb contact and still finish. Also reduces the amount of energy lost from contact layups.
Requirements: Driving Layup 64 (GOLD) 82 (HOF) or OVR 98
GIANT SLAYER – Heightens the effectiveness of layups over taller defenders. Boosts the shot percentage for a layup attempt when mismatched against a taller defender and reduces the possibility of getting blocked.
Requirements: Close Shot 66 (GOLD) 84 (HOF) or Driving Layup 67 (GOLD) 85 (HOF) or OVR 97
HEAT SEEKER * – Gives an additional takeover boost on inside shots. Shots taken around the painted area, including dunks and layups, receive a greater boost towards the takeover meter.
Requirements: Close Shot or Driving Layup 51 (GOLD) 83 (HOF)
HIGHLIGHT FILM * – Boosts teammates/ takeover meter after dunks. Dunks performed either on a fastbreak or with style give a boost to all of your teammates’ takeover progress.
Requirements: Driving Dunk 63 (GOLD) 81 (HOF)
HOOK SPECIALIST * – Increases post hook shot percentage. Gives a boost to post hooks taken from any distance.
Requirements: Close Shot 63 (GOLD) 81 (HOF)
LOB CITY FINISHER – Improves the chances of completing a successful alley-oop dunk/layup. Improves a player’s ability to successfully finish an alley-oop layup or dunk. The shot must be taken before the receiver lands.
Requirements: Driving Dunk 72 (GOLD) 92 (HOF) or Standing Dunk 68 (GOLD) 88 (HOF)
POST SPIN TECHNICIAN – Improves the ability of a post spin or drive to work effectively. Attempting to do post spins or drives result in more effective moves, and less of a chance to be stripped.
Requirements: Post Control 64 (GOLD) 82 (HOF) or OVR 96
POSTERIZER * – Improves the likelihood of posterizing your opponent
Requirements: Driving Dunk or Standing Dunk 72 (GOLD) 92 (HOF)
PRO TOUCH – Gives an additional boost for having good layup timing. Gives an extra shot boost for having slightly early, slightly late, or excellent shot timing on layups.
Requirements: Close Shot 65 (GOLD) 83 (HOF) or Driving Layup 66 (GOLD) 84 (HOF) or OVR 96
PUTBACK BOSS – Increases shot percentage when attempting a putback after an offensive rebound. Boosts the shot attributes of a player that attempts a putback layup or dunk right after getting an offensive rebound.
Requirements: Close Shot 52 (GOLD) 77 HOF), Driving Dunk 53 (GOLD) 78 (HOF), or Standing Dunk 53 (GOLD) 78 (HOF)
RISE UP * – Makes it easier to dunk when under the basket
Requirements: Standing Dunk 69 (GOLD) 89 (HOF)
SLITHERY FINISHER – Improves a player’s ability to avoid contact when attacking the rim. Increases a player’s ability to slide through traffic and avoid contact during gathers and finishes at the rim.
Requirements: Driving Layup 74 (GOLD) 93 (HOF) or Driving Dunk 75 (GOLD) 94 (HOF)
TEAR DROPPER – Increases the chance of hitting floaters and runners. Improves a player’s ability to knock down floaters and runners.
Requirements: Close Shot or Driving Layup 62 (GOLD) 79 (HOF) or OVR 96
Shooting Badges
ANTI-FREEZE * – Harder to get cold and lose your takeover progress. Reduces the liklihood of getting cold and losing takeover after taking poor shots.
Requirements: Mid-Range Shot 57 (GOLD) 73 (HOF) or Three-Point Shot 55
BLINDERS * – Becomes unfazed by defenders from the side. Jump shots taken with a defender closing out in their peripheral vision will suffer a lower penalty.
Requirements: Mid-Range Shot or Three-Point Shot 66 (GOLD) 84 (HOF)
CATCH & SHOOT – Boosts the chance of hitting a jump shot immediately after a catch. For a short time after receiving a pass, the receiver’s outside shooting attributes get a significant boost.
Requirements: Three-Point Shot 70 (GOLD) 90 (HOF) or OVR 98
CIRCUS THREES * – Boosts to stepback threes. Stepback threes taken off the dribble receive a boost.
Requirements: Three-Point Shot 71 (GOLD) 90 (HOF) or OVR 99
CLUTCH SHOOTER – Increases the ability to knock down shots in clutch moments. Shot attempts that occur during the final moments of the 4th quarter, or in any overtime period, receive a large boost.
Requirements: Mid-Range Shot 61 (GOLD) 78 (HOF) or Three-Point Shot 62 (GOLD) 79 (HOF)
CORNER SPECIALIST – Gives a boost to shots taken near the corner. Deep mid-range or 3PT shots taken along the baseline of the court receive a boost, whether it is off the dribble or off a catch.
Requirements: Three-Point Shot 69 (GOLD) 88 (HOF) or 97 OVR
DEADEYE – Reduces the impact of a defender who is closing out. Jump shots taken with a defender closing out receive less of a penalty from a shot contest. This includes both mid-range and 3PT shots.
Requirements: Three-Point Shot 73 (GOLD) 93 (HOF)
DEEP THREES * – Extends the range from which a player can effectively shoot threes. Adds extra distance for which a player’s given shot range is from three point territory.
Requirements: Three-Point Shot 77 (GOLD) 94 (HOF)
DIFFICULT SHOTS – Improves the ability to shoot difficult shots off the dribble. High difficulty jumpers such as hop steps, spins, stepbacks, and pull-ups receive a shot percentage boost.
Requirements: Mid-Range Shot 72 (GOLD) 92 (HOF)
FADE ACE * – Improves ability to shoot post fades. Shot boost to post fadeaways taken from ANY distance.
Requirements: Mid-Range Shot 56 (GOLD) 74 (HOF) or OVR 98
GREEN MACHINE – Increases the bonus given for consecutive excellent releases. Gives an additional shot boost when consecutively achieving excellent releases on jump shots.
Requirements: Mid-Range Shot or Three-Point Shot 74 (GOLD) 93 (HOF)
HOT SHOT * – Boosts takeover meter after hitting jump shots. Gives an additional boost towards takeover progress after making jump shots.
Requirements: Mid-Range Shot or Three-Point Shot 70 (GOLD) 89 (HOF) or OVR 98
HOT ZONE HUNTER – Boosts the shot percentage for attempts taken in a player’s favorite spots. Shots that are taken in a player’s hot zone(s) are given a boost.
Requirements: Mid-Range Shot 75 or Three-Point Shot 75
ICE IN VEINS – Improves a player’s free throw percentage during critical moments. Free throws taken in the second half of close games or overtime periods are given a boost. Also, the timing window for free throws becomes larger.
Requirements: Free Throw 56 (GOLD) 72 (HOF)
RHYTHM SHOOTER * – Improves shots taken after breaking down your defender. Increases the chances of a made shot after sizing up your opponent with dribble moves.
Requirements: Mid-Range Shot or Three-Point Shot 67 (GOLD) 86 (HOF)
SET SHOOTER * – Increases shot rating when taking your time before shooting. Gives a shot boost after standing still before taking a jump shot.
Requirements: Mid-Range Shot 60 (GOLD) 77 (HOF) or Three-Point Shot 63 (GOLD) 80 (HOF)
SLIPPERY OFF-BALL – Strengthens the player’s ability to get open off the ball. When attempting to get open off screens, the player more effectively navigates through traffic.
Requirements: Mid-Range Shot 58 (GOLD) 75 (HOF) or Three-Point Shot 59 (GOLD) 76 (HOF)
SNIPER * – Boosts to well aimed shots. Jump Shots taken with the aiming stick will receive a boost when aimed correctly.
Requirements: Mid-Range Shot 69 (GOLD) 90 (HOF) or Three-Point Shot 71 (GOLD) 91 (HOF) or OVR 99
STOP & POP * – Boosts shot rating on stand-still three pointers after dribbling. Boosts shot rating on stand-still three pointers after dribbling.
Requirements: Three-Point Shot 72 (GOLD) 92 (HOF)
TIRELESS SHOOTER – Improves a player’s ability to make shots when fatigued. Shot attributes on jump shots suffer a smaller penalty than normal when fatigued.
Requirements: Mid-Range Shot 71 (GOLD) 90 (HOF) or Three-Point Shot 69 (GOLD) 88 (HOF) or OVR 97
VOLUME SHOOTER – Boosts shot percentages as shot attempts accrue throughout the game. After a player has taken a small handful of shots, an additional boost to shot attributes is given for every subsequent shot, whether it’s a make or a miss.
Requirements: Mid-Range Shot or Three-Point Shot 68 (GOLD) 87 (HOF) or OVR 96
Playmaking Badges
ANKLE BREAKER – Improves the likelihood of freezing or dropping a defender during dribble moves. When performing stepbacks and other certain moves, the defender stumbles or falls more frequently when biting the wrong way.
Requirements: PG, SG, SF: Ball Handle 74 (GOLD) 94 HOF; PF: Ball Handle 74 (GOLD)
BAIL OUT – Increases the chances of successfully completing a pass from mid-air. Passing out of a jump shot or layup yields fewer errant passes than normal.
Requirements: PG, SG, SF: Pass Accuracy 65 (GOLD) 83 (HOF); PF: Pass Accuracy 61 (GOLD) 80 (HOF); C: Pass Accuracy 56 (GOLD) 76 (HOF).
BREAK STARTER – Improves a player’s ability to make effective outlet passes after grabbing a rebound. After grabbing a defensive board, deep outlet passes made up the court are more accurate. Passes must be made quickly following the defensive rebound.
Requirements: PG, SG, SF: Pass Accuracy 50 (GOLD) 64 (HOF); PF: Pass Accuracy 45 (GOLD) 62 (HOF); Pass Accuracy 40 (GOLD) 60 (HOF)
BULLET PASSER * – Improves a player’s ability to quickly pass the ball. Speeds up how quickly a player gets the ball out of their hands as well as the velocity of the pass.
Requirements: PG, SG, SF: Pass Accuracy 66 (GOLD) 84 (HOF); PF: Pass Accuracy 65 (GOLD) 83 (HOF); C: Pass Accuracy 64 (GOLD) 82 (HOF).
DIMER – Boosts the shot percentage for open teammates on jump shots after catching a pass. When in the half-court, passes by Dimers to open shooters yield a shot percentage boost.
Requirements: PG, SG, SF: Pass Accuracy 70 (GOLD) 90 (HOF); PF: Pass Accuracy 67 (GOLD) 85 (HOF); C: Pass Accuracy 63 (GOLD) 81 (HOF).
DOWNHILL – Increases overall speed with the ball in transition. Gives a bonus to a player’s Speed With Ball attribute in fastbreak situations.
Requirements: PG, SG, SF: Speed with Ball 62 (GOLD) 80 (HOF); PF: Speed with Ball 55 (GOLD) 70 (HOF); C: Speed with Ball 47 (HOF) 65 (HOF)
FLOOR GENERAL – Teammates receive an offensive attribute bonus when player is in the game. Gives offensive attribute boosts to teammates when on the floor. Also, at the Hall of Fame level, can see teammates` potential shot percentages while on offense.
Requirements: PG, SG, SF: Pass Accuracy 71 (GOLD) 91 (HOF); PF, C: Pass Accuracy 71 (GOLD) 91 (HOF).
HANDLES FOR DAYS – Reduces the amount of energy lost when performing dribble moves. A player takes less of an energy hit when performing consecutive dribble moves, allowing them to chain together combos quicker for longer periods of time.
Requirements: PG, SG, SF: Ball Handle 64 (GOLD) 82 (HOF); PF: Ball Handle 60 (GOLD) 77 (HOF); C: Ball Handle 49 (GOLD) 66 (HOF).
NEEDLE THREADER – Increases the likelihood that tough passes can get by the defense. When passing through a tight window between defenders, a boost is given to the player’s passing ability.
Requirements: PG, SG, SF: Pass Accuracy 72 (GOLD) 92 (HOF); PF: Pass Accuracy 57 (GOLD) 73 (HOF); C: Pass Accuracy 50 (GOLD) 67 (HOF).
QUICK FIRST STEP – Provides more explosive first steps out of triple threat and size-ups. When driving out of triple threat or after a size-up, ball handlers have access to quicker and more effective launches.
Requirements: PG, SG, SF: Speed with Ball 74 (GOLD) 94 (HOF); PF: Speed with Ball 64 (GOLD) 81 (HOF); C: Speed with Ball 55 (GOLD).
RELAY PASSER * – Provides a boost to shooters on a pass to assist. A shot boost is given to the player receiving the pass after your pass.
Requirements: Pass Accuracy 49 (GOLD) HOF (67)
SPACE CREATOR – Improves a player’s ability to create space from a defender. When performing any stepback move or shot, there’s a higher chance of successfully creating separation from the opponent.
Requirements: PG, SG, SF: Ball Handle 58 (GOLD) 74 (HOF); PF: Ball Handle 55 (GOLD) 72 (HOF); C: Ball Handle 50 (GOLD) 70 (HOF).
SPECIAL DELIVERY * – Gives boost to passer and receiver’s takeover meter following a flashy pass if the shot goes in. Takeover boost for both the passer and receiver after a flashy assist. Additionally, this badge increases alley-oop throw success and shot chance for receivers after a flashy pass.
Requirements: PG, SG, SF: Pass Accuracy 55 (GOLD) 70 (HOF); PF: Pass Accuracy 53 (GOLD) HOF (68); C: Pass Accuracy 48 (GOLD) 66 (HOF).
STOP & GO – Improves a player’s ability to start and stop with the ball. Allows for the ball handler to start and stop quickly with unique stops and launches exclusive to this badge.
Requirements: PG, SG, SF: Ball Handle 69 (GOLD) 88 (HOF); PF: Ball Handle 69 (GOLD).
TIGHT HANDLES – Improves a player’s ability to break down their defender. Increases a player’s ball handling ability in size-up situations, making it easier to break down the on-ball defender.
Requirements: PG, SG, SF: Ball Handle 72 (GOLD) 92 (HOF); PF: Ball Handle 54 (GOLD) 69 (HOF); C: Ball Handle 51 (GOLD) 67 (HOF).
UNPLUCKABLE – Reduces the chances of getting stripped by the defender. When performing dribble moves, defenders have a tougher time poking the ball free with their steal attempts.
Requirements: PG, SG, SF: Ball Handle 57 (GOLD) 73 (HOF); PF: Ball Handle 53 (GOLD) 67 (HOF); C: Ball Handle 48 (GOLD) 65 (HOF).
Defense / Rebounding Badges
ANKLE BRACES * – Reduces the chances of getting crossed over. Lowers the likelihood of getting ankle-broken by opposing dribble moves.
Requirements: Perimeter Defense 64 (GOLD) 82 (HOF)
BOX – Improves player’s ability to box out opponents. Strengthens a player’s ability to effectively box out opponents in anticipation of a rebound.
Requirements: Offensive Rebound 66 (GOLD) 84 (HOF) or Defensive Rebound 68 (GOLD) 86 (HOF).
BRICK WALL – Increases effectiveness of screens and drains energy from opponents on physical contact. This badge makes it tougher for the defense to get through or around screens. Players hit by contact from a Brick Wall lose more energy than normal.
Requirements: Strength or Interior Defense 62 (GOLD) 79 (HOF)
CHASE DOWN ARTIST – Raises the chances of getting a chase-down block. Boosts the speed and leaping ability of a player when he is chasing down an offensive player in anticipation of a block attempt.
Requirements: Block 63 (GOLD) 81 (HOF) or 98 OVR
CLAMPS – Boosts the ability to stay in front of the ball handler on the perimeter. Defenders have access to quicker cut off moves and are more successful when bumping or hip riding the ball handler.
Requirements: Perimeter Defense 80 (GOLD) 94 (HOF)
CLUTCH DEFENDER * – Steps up defensively in big moments. Boosts defensive abilities during clutch situations.
Requirements: Perimeter Defense or Interior Defense 65 (GOLD) 83 (HOF)
DEFENSIVE LEADER – Boosts the defensive abilities of teammates when in the game. Lifts the defensive abilities of teammates when on the court. Also, at the Hall of Fame level, can see potential shot percentages of opposing players.
Requirements: Perimeter Defense or Interior Defense 71 (GOLD) 91 (HOF)
HEART CRUSHER – Decreases opponents’ Takeover meters when achieving a highlight play on defense. After successfully blocking or stealing the ball from an opponent, an additional penalty is given to the opposing player’s Takeover meter.
Requirements: Steal 56 (GOLD) 71 (HOF) or Block 50 (GOLD) 70 (HOF)
HOT STOPPER * – Boosts takeover meter after making defensive plays. Gives an additional boost towards takeover progress after making plays on the defensive end.
Requirements: Perimeter Defense 66 (GOLD) 84 (HOF) or Interior Defense 61 (GOLD) 79 (HOF)
INTERCEPTOR – Increases chances at getting steals in passing lanes. The frequency of successfully tipped or intercepted passes greatly increases.
Requirements: Steal 62 (GOLD) 84 (HOF)
INTIMIDATOR – Intimidates offensive players causing them to miss shots more often. Offensive players have less success shooting when contested by players with this badge. Also boosts the shot defense ratings when tightly guarding an opponent.
Requirements: Block 74 (GOLD) 94 (HOF)
OFF-BALL PEST – Improves a player’s ability to bump and harass the offense off the ball. Makes players more difficult to get past when playing off-ball, as they can grab and hold their matchup and don’t get their ankles broken as often.
Requirements: Perimeter Defense 52 (GOLD) 69 (HOF)
PICK DODGER – Improves a player’s ability to navigate through screens effectively on defense.
Requirements: Perimeter Defense 61 (GOLD) 78 (HOF)
PICK POCKET – Improves a player’s ability to steal the ball from a ball handler. Increases the chances of a steal and reduces the chances of a foul when attempting to strip the ball from a ball handler. Also improves the chances of successful layup strips.
Requirements: Steal 69 (GOLD) 88 (HOF)
POGO STICK – Improves the ability to attempt multiple blocks in succession. Allows players to quickly go back up for another block attempt upon landing.
Requirements: Block 70 (GOLD) 90 (HOF) or Offensive Rebound or Defensive Rebound 69 (GOLD) 88 (HOF).
POST LOCKDOWN – Improves the defender’s ability to defend post moves. Increases the chances of a defender preventing an offensive post move from succeeding.
Requirements: Interior Defense 66 (GOLD) 84 (HOF)
REBOUND CHASER – Improves a player’s ability to chase down rebounds. Improves a player’s ability to track down rebounds from farther distances than normal.
Requirements: Offensive Rebound 64 (GOLD) 82 (HOF) or Defensive Rebound 65 (GOLD) 83 (HOF)
RIM PROTECTOR – Improves ability to block shots, gives boost to the Takeover meter for blocker/teammates. Improves player’s ability to block shots, unlocks special block animations and gives boost to the Takeover meter for the blocker and blocker’s teammates following a block.
Requirements: Block 64 (GOLD) 82 (HOF) or OVR 99
TIRELESS DEFENDER – Reduces the energy lost when exerting effort on defense. Allows defenders to play defense more aggressively without losing energy at the same rate as a normal player.
Requirements: Perimeter Defense 64 (GOLD) 82 (HOF) or Interior Defense 60 (GOLD) 78 (HOF)
TRAPPER – Makes life difficult for the offensive players when trapped. When trapping offensive players, defenders are more effective at forcing pick ups and turnovers than normal.
Requirements: Perimeter Defense 55 (GOLD) 71 (HOF)
WORM – Allows rebounders to swim or spin around box outs more easily. When boxed out, rebounders have more success swimming around and getting into successful rebound position.
Requirements: Offensive Rebound 61 (GOLD) 78 (HOF) or Defensive Rebound 64 (GOLD) 82 (HOF)
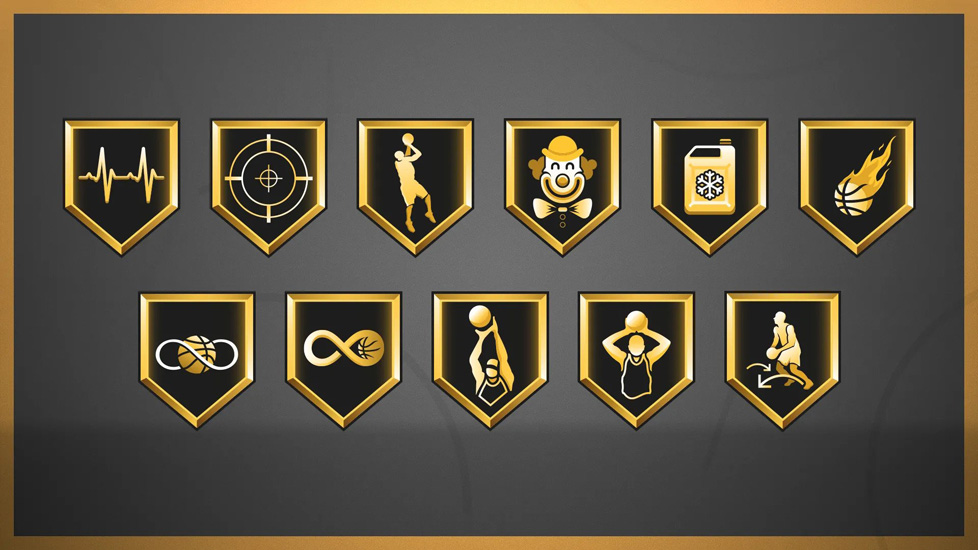
Takeovers (24)
Instead of limiting players to eight general archetype-based takeovers, Takeovers have been broken from 8 (on Current-Gen) into 24 more specific takeover abilities on Next-Gen. Takeovers give temporary boosts to your MyPLAYER that you can fire off when your player gets hot.
From 2K Gameplay Director, Mike Wang:
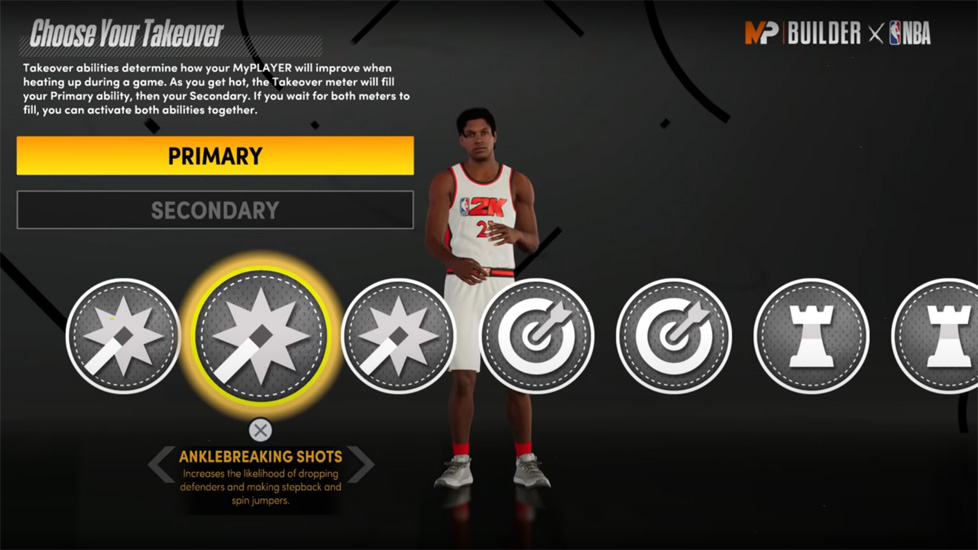
We’ve also changed Takeover to be a multi-tier system! Once you set up your ratings caps and vitals, you’ll be presented with a subset of the list above based on the type of build you made. Then you choose one ability for your primary and another for your secondary, or if you want, you can put the same ability in both slots if you want to “double up” on it. When you’re in-game, your takeover meter will fill up your primary takeover slot first. Once filled, you can choose to activate it right away or wait to try and fill up your secondary slot. You must be careful because you take the risk of losing all your progress if you turn the ball over or miss a bad shot. But if you can fill in your secondary slot, you can activate both the primary and secondary takeovers together and keep them active for a longer period of time. Finally, if you want to devastate your opponent even further, you can wait even longer and try to fill up the Team Takeover meter. If you can fill all three, activating will enable your entire teams’ takeovers and it’s pretty much over for the competition. And just like in current-gen, activating Team Takeover also allows you to have user-control over your teammates in MyCAREER games.
- ADVANCED GATHERS – Unlocks more effective spin, euro, hop step, cradle gathers
- FINISHING MOVES – Able to absorb contact and finish at the rim
- EASY BLOWBYS – Enhances ability for slashers to beat defenders off the dribble
- PULL-UP PRECISION – Boosts well timed/aimed shots off the dribble
- ANKLEBREAKING SHOTS – More ankle breakers off of spin and stepback jumpers
- NEGATIVE IMPACT – Reduces defensive impact against pull-ups and other skill shots
- LIMITLESS RANGE – Extends your shooting range out to the logos
- SPOT-UP PRECISION – Boosts well timed/aimed stationary jump shots
- TEAM RATINGS BOOST – Playmakers boost their teammates’ offensive ratings
- TEAM TAKEOVER BOOST – Boost your teammates’ takeover meter progress
- TEAM BADGE BOOST – Boosts your teammates’ badges up a tier
- EXTREME CLAMPS – More stone wall and lost dribble body-up resolutions for locks
- PERIMETER BADGE DROP – Knocks shooting badges down a tier when you get close
- ENHANCED JUMP SHOT CONTESTS – Boosts your ability to contest jumpers
- STUFF BLOCKS – Unlocks more swat, backboard pins, and grab blocks
- PAINT INTIMIDATION – Boosts your ability to affect shots around the rim
- INTERIOR BADGE DROP – Drops opposition’s scoring badges down a tier in the paint
- BOXOUT WALL – Improves ability to seal off opponents for easy boards
- SEE THE FUTURE – Shows where missed shots are going to end up
- GLASS CLEARING DIMES – After rebounds, kick out passes boost your teammate’s
- shooting
- POWER BACKDOWNS – Easier to push defenders around when posting up
- POST PLAYMAKING – Boost your teammates’ offensive abilities when passing out of post
- ADVANCED POST MOVES – Easier to beat defenders with post moves
- POST SHOT DAGGERS – Increased scoring ability with hooks, fades, shimmy shots, etc.
Special Takeover: MAMBA MENTALITY (In honor of the late Kobe Bryant) – When you’ve earned all your badge points, you will receive the Mamba Mentality badge which allows you to change your takeovers whenever you want.
NEXT PAGE: NBA 2K21 CURRENT-GEN BADGES & TAKEOVER GUIDE


What would be the best badges for a 6’6 0/26/21/12 build