


Here is the NBA 2K24 Badges & Takeover Guide, & Analysis, which lists all badges, descriptions, takeovers, badge perks, takeover perks, how to unlock badges, as well as a breakdown of tips, info, and more when you click on each individual badge.
24 new badges were added to NBA 2K24 on New Gen consoles, and with some removals, it brings it to a total of 77 skill badges across MyTEAM and MyCAREER. Learn more about the added scoring, ball-handling and passing, and defensive badges below.
Badges have been split into four tiers: S-, A-, B-, and C-Tier, with S-Tier badges being regarded as the best of the lot. A player’s height determines Tier assignments, and each badge has a unique set of attribute requirements for unlocking the use of the badge.
How to Equip Badges & Badge Progression
An all-new badge progression system that helps bring a more authentic feeling to a player’s MyPLAYER build. Players will no longer have to pick and choose which badges to equip to their MyPLAYER, and they’re no longer stuck within the badge points and attribute categories they were once limited to. Badges are earned by badge usage, meaning the more a player uses a badge in-game, the more they’ll progress toward to the next level in which they qualify.
How Badge Regression Works
Badges with lower usage and success will trend towards the lower levels. There is a floor, however, as your badge will never drop below Bronze. Like riding a bike, if a badge drops below a level you once had, regaining that level takes less time than it did the first time around. Certain badges are also protected from games in which they cannot fire, such as the Relay Passer Badge in a 2v2 game. You can also use some Badge Perks (see further below) to affect badge regression.
1. Badge Requirements
2. Badge Descriptions
3. Badge Perks
4. Performance Multipliers
5. Takeover Guide
6. Takeover Perks
NBA 2K24 Badge Requirements
TABLE DEFINITIONS
- An “Always Attribute” is an attribute to unlock a badge that is always required, either by itself or with other attributes.
- An “Either / Or Attribute” is an attribute that is one of the options unlock a badge, either by itself or with other attributes.
KEY:
* = 1 attribute only required
** = either/or attribute(s) but no ‘always attribute(s)’
*** = either/or attribute(s) + always attribute(s)
**** = always attribute(s) + either/or attribute(s)
***** = always attribute(s) + always attribute(s)
(Scroll to the right to view more Attributes)
| Name | Level | Type | Close | Layup | Drv Dunk | Stn Dunk | Post Ctrl | Mid | 3PT | FT | Pass | Ball Hndl | Spd w/Ball | Int D | Per D | Stl | Blk | O Reb | D Reb | Spd | Acc | Acc | Str | Vert | Stam | Min Ht. | Max Ht. |
|---|---|---|---|---|---|---|---|---|---|---|---|---|---|---|---|---|---|---|---|---|---|---|---|---|---|---|---|
| 94 Feet | Bronze | Def / Reb | 76 ***** | 87 ***** | 6 ft 08 | ||||||||||||||||||||||
| 94 Feet | Silver | Def / Reb | 81 ***** | 90 ***** | 6 ft 08 | ||||||||||||||||||||||
| 94 Feet | Gold | Def / Reb | 88 ***** | 95 ***** | 6 ft 08 | ||||||||||||||||||||||
| 94 Feet | HOF | Def / Reb | 93 ***** | 99 ***** | 6 ft 08 | ||||||||||||||||||||||
| Acrobat | Bronze | Finishing | 64 * | 6 ft 11 | |||||||||||||||||||||||
| Acrobat | Silver | Finishing | 76 * | 6 ft 11 | |||||||||||||||||||||||
| Acrobat | Gold | Finishing | 84 * | 6 ft 11 | |||||||||||||||||||||||
| Acrobat | HOF | Finishing | 90 * | 6 ft 11 | |||||||||||||||||||||||
| Anchor | Bronze | Def / Reb | 61 ***** | 77 ***** | 6 ft 07 | ||||||||||||||||||||||
| Anchor | Silver | Def / Reb | 72 ***** | 87 ***** | 6 ft 07 | ||||||||||||||||||||||
| Anchor | Gold | Def / Reb | 77 ***** | 92 ***** | 6 ft 07 | ||||||||||||||||||||||
| Anchor | HOF | Def / Reb | 85 ***** | 99 ***** | 6 ft 07 | ||||||||||||||||||||||
| Agent 3 | Bronze | Shooting | 76 * | 6 ft 11 | |||||||||||||||||||||||
| Agent 3 | Silver | Shooting | 86 * | 6 ft 11 | |||||||||||||||||||||||
| Agent 3 | Gold | Shooting | 94 * | 6 ft 11 | |||||||||||||||||||||||
| Agent 3 | HOF | Shooting | 98 * | 6 ft 11 | |||||||||||||||||||||||
| Ankle Breaker | Bronze | Playmaking | 62 * | 6 ft 09 | |||||||||||||||||||||||
| Ankle Breaker | Silver | Playmaking | 75 * | 6 ft 09 | |||||||||||||||||||||||
| Ankle Breaker | Gold | Playmaking | 85 * | 6 ft 09 | |||||||||||||||||||||||
| Ankle Breaker | HOF | Playmaking | 93 * | 6 ft 09 | |||||||||||||||||||||||
| Aerial Wizard | Bronze | Finishing | 57 *** | 64 *** | 60 *** | 58 **** | |||||||||||||||||||||
| Aerial Wizard | Silver | Finishing | 69 *** | 75 *** | 72 *** | 67 **** | |||||||||||||||||||||
| Aerial Wizard | Gold | Finishing | 78 *** | 84 *** | 84 *** | 72 **** | |||||||||||||||||||||
| Aerial Wizard | HOF | Finishing | 87 *** | 95 *** | 92 *** | 84 **** | |||||||||||||||||||||
| Ankle Braces | Bronze | Def / Reb | 64 * | 6 ft 11 | |||||||||||||||||||||||
| Ankle Braces | Silver | Def / Reb | 78 * | 6 ft 11 | |||||||||||||||||||||||
| Ankle Braces | Gold | Def / Reb | 89 * | 6 ft 11 | |||||||||||||||||||||||
| Ankle Braces | HOF | Def / Reb | 94 * | 6 ft 11 | |||||||||||||||||||||||
| Backdown Punisher | Bronze | Finishing | 63 ***** | 70 ***** | 6 ft 04 | ||||||||||||||||||||||
| Backdown Punisher | Silver | Finishing | 70 ***** | 79 ***** | 6 ft 04 | ||||||||||||||||||||||
| Backdown Punisher | Gold | Finishing | 81 ***** | 86 ***** | 6 ft 04 | ||||||||||||||||||||||
| Backdown Punisher | HOF | Finishing | 90 ***** | 95 ***** | 6 ft 04 | ||||||||||||||||||||||
| Bailout | Bronze | Playmaking | 87 * | 6 ft 10 | |||||||||||||||||||||||
| Bailout | Silver | Playmaking | 91 * | 6 ft 10 | |||||||||||||||||||||||
| Bailout | Gold | Playmaking | 95 * | 6 ft 10 | |||||||||||||||||||||||
| Bailout | HOF | Playmaking | 99 * | 6 ft 10 | |||||||||||||||||||||||
| Big Driver | Bronze | Playmaking | 55 ***** | 40 ***** | 40 ***** | 6 ft 10 | |||||||||||||||||||||
| Big Driver | Silver | Playmaking | 62 ***** | 48 ***** | 48 ***** | 6 ft 10 | |||||||||||||||||||||
| Big Driver | Gold | Playmaking | 65 ***** | 55 ***** | 55 ***** | 6 ft 10 | |||||||||||||||||||||
| Big Driver | HOF | Playmaking | 69 ***** | 65 ***** | 60 ***** | 6 ft 10 | |||||||||||||||||||||
| Blinders | Bronze | Shooting | 70 ** | 70 ** | |||||||||||||||||||||||
| Blinders | Silver | Shooting | 83 ** | 79 ** | |||||||||||||||||||||||
| Blinders | Gold | Shooting | 89 ** | 90 ** | |||||||||||||||||||||||
| Blinders | HOF | Shooting | 97 ** | 97 ** | |||||||||||||||||||||||
| Blow By | Bronze | Playmaking | 67 ***** | 62 ***** | 61 ***** | 6 ft 11 | |||||||||||||||||||||
| Blow By | Silver | Playmaking | 84 ***** | 75 ***** | 73 ***** | 6 ft 11 | |||||||||||||||||||||
| Blow By | Gold | Playmaking | 92 ***** | 83 ***** | 83 ***** | 6 ft 11 | |||||||||||||||||||||
| Blow By | HOF | Playmaking | 97 ***** | 89 ***** | 90 ***** | 6 ft 11 | |||||||||||||||||||||
| Boxout Beast | Bronze | Def / Reb | 59 *** | 60 *** | 70 **** | 6 ft 03 | |||||||||||||||||||||
| Boxout Beast | Silver | Def / Reb | 77 *** | 77 *** | 72 **** | 6 ft 03 | |||||||||||||||||||||
| Boxout Beast | Gold | Def / Reb | 85 *** | 85 *** | 84 **** | 6 ft 03 | |||||||||||||||||||||
| Boxout Beast | HOF | Def / Reb | 93 *** | 93 *** | 90 **** | 6 ft 03 | |||||||||||||||||||||
| Breakstarter | Bronze | Playmaking | 68 * | ||||||||||||||||||||||||
| Breakstarter | Silver | Playmaking | 75 * | ||||||||||||||||||||||||
| Breakstarter | Gold | Playmaking | 86 * | ||||||||||||||||||||||||
| Breakstarter | HOF | Playmaking | 92 * | ||||||||||||||||||||||||
| Brick Wall | Bronze | Def / Reb | 72 * | 6 ft 06 | |||||||||||||||||||||||
| Brick Wall | Silver | Def / Reb | 83 * | 6 ft 06 | |||||||||||||||||||||||
| Brick Wall | Gold | Def / Reb | 90 * | 6 ft 06 | |||||||||||||||||||||||
| Brick Wall | HOF | Def / Reb | 99 * | 6 ft 06 | |||||||||||||||||||||||
| Bulldozer | Bronze | Finishing | 74 * | 6 ft 05 | |||||||||||||||||||||||
| Bulldozer | Silver | Finishing | 84 * | 6 ft 05 | |||||||||||||||||||||||
| Bulldozer | Gold | Finishing | 92 * | 6 ft 05 | |||||||||||||||||||||||
| Bulldozer | HOF | Finishing | 96 * | 6 ft 05 | |||||||||||||||||||||||
| Bunny | Bronze | Finishing | 62 ** | 68 ** | |||||||||||||||||||||||
| Bunny | Silver | Finishing | 72 ** | 77 ** | |||||||||||||||||||||||
| Bunny | Gold | Finishing | 84 ** | 86 ** | |||||||||||||||||||||||
| Bunny | HOF | Finishing | 94 ** | 93 ** | |||||||||||||||||||||||
| Catch & Shoot | Bronze | Shooting | 60 ** | 63 ** | |||||||||||||||||||||||
| Catch & Shoot | Silver | Shooting | 70 ** | 74 ** | |||||||||||||||||||||||
| Catch & Shoot | Gold | Shooting | 82 ** | 85 ** | |||||||||||||||||||||||
| Catch & Shoot | HOF | Shooting | 93 ** | 95 ** | |||||||||||||||||||||||
| Challenger | Bronze | Def / Reb | 71 * | ||||||||||||||||||||||||
| Challenger | Silver | Def / Reb | 82 * | ||||||||||||||||||||||||
| Challenger | Gold | Def / Reb | 87 * | ||||||||||||||||||||||||
| Challenger | HOF | Def / Reb | 94 * | ||||||||||||||||||||||||
| Chasedown Artist | Bronze | Def / Reb | 68 ***** | 50 ***** | 60 ***** | 6 ft 03 | |||||||||||||||||||||
| Chasedown Artist | Silver | Def / Reb | 78 ***** | 60 ***** | 74 ***** | 6 ft 03 | |||||||||||||||||||||
| Chasedown Artist | Gold | Def / Reb | 87 ***** | 66 ***** | 80 ***** | 6 ft 03 | |||||||||||||||||||||
| Chasedown Artist | HOF | Def / Reb | 94 ***** | 71 ***** | 83 ***** | 6 ft 03 | |||||||||||||||||||||
| Clamps | Bronze | Def / Reb | 75 ***** | 45 ***** | 6 ft 09 | ||||||||||||||||||||||
| Clamps | Silver | Def / Reb | 85 ***** | 50 ***** | 6 ft 09 | ||||||||||||||||||||||
| Clamps | Gold | Def / Reb | 93 ***** | 55 ***** | 6 ft 09 | ||||||||||||||||||||||
| Clamps | HOF | Def / Reb | 99 ***** | 60 ***** | 6 ft 09 | ||||||||||||||||||||||
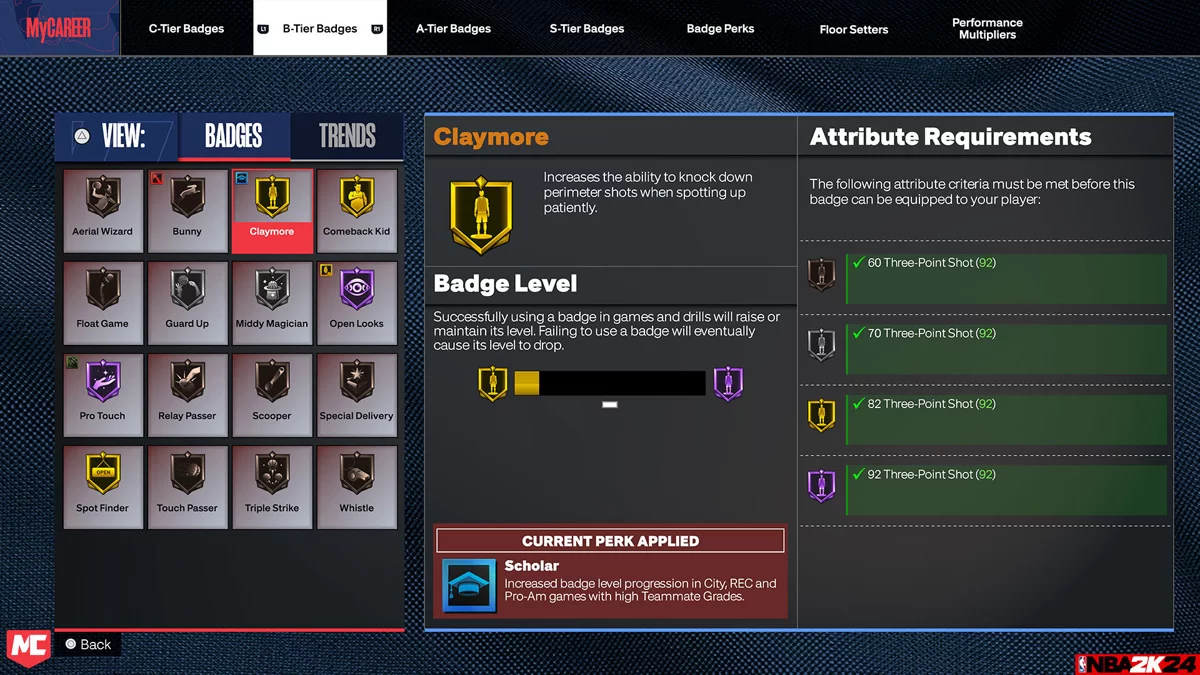
| Claymore | Bronze | Shooting | 60 * | ||||||||||||||||||||||||
| Claymore | Silver | Shooting | 70 * | ||||||||||||||||||||||||
| Claymore | Gold | Shooting | 82 * | ||||||||||||||||||||||||
| Claymore | HOF | Shooting | 92 * | ||||||||||||||||||||||||
| Comeback Kid | Bronze | Shooting | 53 ** | 56 ** | |||||||||||||||||||||||
| Comeback Kid | Silver | Shooting | 64 ** | 68 ** | |||||||||||||||||||||||
| Comeback Kid | Gold | Shooting | 75 ** | 79 ** | |||||||||||||||||||||||
| Comeback Kid | HOF | Shooting | 86 ** | 89 ** | |||||||||||||||||||||||
| Corner Specialist | Bronze | Shooting | 65 * | ||||||||||||||||||||||||
| Corner Specialist | Silver | Shooting | 76 * | ||||||||||||||||||||||||
| Corner Specialist | Gold | Shooting | 85 * | ||||||||||||||||||||||||
| Corner Specialist | HOF | Shooting | 94 * | ||||||||||||||||||||||||
| Deadeye | Bronze | Shooting | 75 ** | 75 ** | |||||||||||||||||||||||
| Deadeye | Silver | Shooting | 84 ** | 84 ** | |||||||||||||||||||||||
| Deadeye | Gold | Shooting | 90 ** | 92 ** | |||||||||||||||||||||||
| Deadeye | HOF | Shooting | 98 ** | 99 ** | |||||||||||||||||||||||
| Dimer | Bronze | Playmaking | 56 * | ||||||||||||||||||||||||
| Dimer | Silver | Playmaking | 73 * | ||||||||||||||||||||||||
| Dimer | Gold | Playmaking | 89 * | ||||||||||||||||||||||||
| Dimer | HOF | Playmaking | 96 * | ||||||||||||||||||||||||
| Dream Shake | Bronze | Finishing | 57 *** | 63 **** | 59 *** | ||||||||||||||||||||||
| Dream Shake | Silver | Finishing | 64 *** | 70 **** | 67 *** | ||||||||||||||||||||||
| Dream Shake | Gold | Finishing | 75 *** | 81 **** | 77 *** | ||||||||||||||||||||||
| Dream Shake | HOF | Finishing | 88 *** | 90 **** | 84 *** | ||||||||||||||||||||||
| Dropstepper | Bronze | Finishing | 64 * | ||||||||||||||||||||||||
| Dropstepper | Silver | Finishing | 75 * | ||||||||||||||||||||||||
| Dropstepper | Gold | Finishing | 84 * | ||||||||||||||||||||||||
| Dropstepper | HOF | Finishing | 95 * | ||||||||||||||||||||||||
| Fast Feet | Bronze | Def / Reb | 72 ***** | 70 ***** | 6 ft 09 | ||||||||||||||||||||||
| Fast Feet | Silver | Def / Reb | 83 ***** | 73 ***** | 6 ft 09 | ||||||||||||||||||||||
| Fast Feet | Gold | Def / Reb | 92 ***** | 77 ***** | 6 ft 09 | ||||||||||||||||||||||
| Fast Feet | HOF | Def / Reb | 97 ***** | 82 ***** | 6 ft 09 | ||||||||||||||||||||||
| Fast Twitch | Bronze | Finishing | 71 ** | 73 ** | |||||||||||||||||||||||
| Fast Twitch | Silver | Finishing | 81 ** | 83 ** | |||||||||||||||||||||||
| Fast Twitch | Gold | Finishing | 90 ** | 92 ** | |||||||||||||||||||||||
| Fast Twitch | HOF | Finishing | 98 ** | 99 ** | |||||||||||||||||||||||
| Fearless Finisher | Bronze | Finishing | 68 *** | 70 *** | 55 **** | ||||||||||||||||||||||
| Fearless Finisher | Silver | Finishing | 77 *** | 80 *** | 60 **** | ||||||||||||||||||||||
| Fearless Finisher | Gold | Finishing | 86 *** | 87 *** | 65 **** | ||||||||||||||||||||||
| Fearless Finisher | HOF | Finishing | 95 *** | 96 *** | 67 **** | ||||||||||||||||||||||
| Float Game | Bronze | Finishing | 60 * | ||||||||||||||||||||||||
| Float Game | Silver | Finishing | 68 * | ||||||||||||||||||||||||
| Float Game | Gold | Finishing | 77 * | ||||||||||||||||||||||||
| Float Game | HOF | Finishing | 88 * | ||||||||||||||||||||||||
| Free Points | Bronze | Shooting | 71 * | ||||||||||||||||||||||||
| Free Points | Silver | Shooting | 80 * | ||||||||||||||||||||||||
| Free Points | Gold | Shooting | 90 * | ||||||||||||||||||||||||
| Free Points | HOF | Shooting | 99 * | ||||||||||||||||||||||||
| Giant Slayer | Bronze | Finishing | 55 ** | 59 ** | 7 ft 00 | ||||||||||||||||||||||
| Giant Slayer | Silver | Finishing | 62 ** | 65 ** | 7 ft 00 | ||||||||||||||||||||||
| Giant Slayer | Gold | Finishing | 75 ** | 74 ** | 7 ft 00 | ||||||||||||||||||||||
| Giant Slayer | HOF | Finishing | 88 ** | 85 ** | 7 ft 00 | ||||||||||||||||||||||
| Glove | Bronze | Def / Reb | 72 * | 7 ft 00 | |||||||||||||||||||||||
| Glove | Silver | Def / Reb | 85 * | 7 ft 00 | |||||||||||||||||||||||
| Glove | Gold | Def / Reb | 91 * | 7 ft 00 | |||||||||||||||||||||||
| Glove | HOF | Def / Reb | 99 * | 7 ft 00 | |||||||||||||||||||||||
| Green Machine | Bronze | Shooting | 61 ** | 64 ** | |||||||||||||||||||||||
| Green Machine | Silver | Shooting | 76 ** | 78 ** | |||||||||||||||||||||||
| Green Machine | Gold | Shooting | 88 ** | 89 ** | |||||||||||||||||||||||
| Green Machine | HOF | Shooting | 95 ** | 95 ** | |||||||||||||||||||||||
| Guard Up | Bronze | Shooting | 59 ** | 60 ** | |||||||||||||||||||||||
| Guard Up | Silver | Shooting | 71 ** | 74 ** | |||||||||||||||||||||||
| Guard Up | Gold | Shooting | 82 ** | 87 ** | |||||||||||||||||||||||
| Guard Up | HOF | Shooting | 91 ** | 94 ** | |||||||||||||||||||||||
| Handles For Days | Bronze | Playmaking | 69 ***** | 90 ***** | 7 ft 00 | ||||||||||||||||||||||
| Handles For Days | Silver | Playmaking | 80 ***** | 93 ***** | 7 ft 00 | ||||||||||||||||||||||
| Handles For Days | Gold | Playmaking | 91 ***** | 96 ***** | 7 ft 00 | ||||||||||||||||||||||
| Handles For Days | HOF | Playmaking | 95 ***** | 99 ***** | 7 ft 00 | ||||||||||||||||||||||
| Hook Specialist | Bronze | Finishing | 60 ***** | 50 ***** | |||||||||||||||||||||||
| Hook Specialist | Silver | Finishing | 71 ***** | 62 ***** | |||||||||||||||||||||||
| Hook Specialist | Gold | Finishing | 83 ***** | 74 ***** | |||||||||||||||||||||||
| Hook Specialist | HOF | Finishing | 92 ***** | 86 ***** | |||||||||||||||||||||||
| Hyperdrive | Bronze | Playmaking | 69 ***** | 72 ***** | 6 ft 10 | ||||||||||||||||||||||
| Hyperdrive | Silver | Playmaking | 75 ***** | 80 ***** | 6 ft 10 | ||||||||||||||||||||||
| Hyperdrive | Gold | Playmaking | 83 ***** | 82 ***** | 6 ft 10 | ||||||||||||||||||||||
| Hyperdrive | HOF | Playmaking | 91 ***** | 90 ***** | 6 ft 10 | ||||||||||||||||||||||
| Immovable Enforcer | Bronze | Def / Reb | 71 * | 6 ft 05 | |||||||||||||||||||||||
| Immovable Enforcer | Silver | Def / Reb | 82 * | 6 ft 05 | |||||||||||||||||||||||
| Immovable Enforcer | Gold | Def / Reb | 90 * | 6 ft 05 | |||||||||||||||||||||||
| Immovable Enforcer | HOF | Def / Reb | 95 * | 6 ft 05 | |||||||||||||||||||||||
| Interceptor | Bronze | Def / Reb | 60 * | ||||||||||||||||||||||||
| Interceptor | Silver | Def / Reb | 81 * | ||||||||||||||||||||||||
| Interceptor | Gold | Def / Reb | 89 * | ||||||||||||||||||||||||
| Interceptor | HOF | Def / Reb | 95 * | ||||||||||||||||||||||||
| Killer Combos | Bronze | Playmaking | 75 * | 6 ft 10 | |||||||||||||||||||||||
| Killer Combos | Silver | Playmaking | 87 * | 6 ft 10 | |||||||||||||||||||||||
| Killer Combos | Gold | Playmaking | 93 * | 6 ft 10 | |||||||||||||||||||||||
| Killer Combos | HOF | Playmaking | 98 * | 6 ft 10 | |||||||||||||||||||||||
| Limitless Range | Bronze | Shooting | 85 * | ||||||||||||||||||||||||
| Limitless Range | Silver | Shooting | 92 * | ||||||||||||||||||||||||
| Limitless Range | Gold | Shooting | 96 * | ||||||||||||||||||||||||
| Limitless Range | HOF | Shooting | 99 * | ||||||||||||||||||||||||
| Masher | Bronze | Finishing | 68 * | ||||||||||||||||||||||||
| Masher | Silver | Finishing | 77 * | ||||||||||||||||||||||||
| Masher | Gold | Finishing | 84 * | ||||||||||||||||||||||||
| Masher | HOF | Finishing | 94 * | ||||||||||||||||||||||||
| Middy Magician | Bronze | Shooting | 59 * | ||||||||||||||||||||||||
| Middy Magician | Silver | Shooting | 72 * | ||||||||||||||||||||||||
| Middy Magician | Gold | Shooting | 84 * | ||||||||||||||||||||||||
| Middy Magician | HOF | Shooting | 92 * | ||||||||||||||||||||||||
| Needle Threader | Bronze | Playmaking | 77 * | ||||||||||||||||||||||||
| Needle Threader | Silver | Playmaking | 84 * | ||||||||||||||||||||||||
| Needle Threader | Gold | Playmaking | 91 * | ||||||||||||||||||||||||
| Needle Threader | HOF | Playmaking | 98 * | ||||||||||||||||||||||||
| Off-Ball Pest | Bronze | Def / Reb | 58 * | ||||||||||||||||||||||||
| Off-Ball Pest | Silver | Def / Reb | 68 * | ||||||||||||||||||||||||
| Off-Ball Pest | Gold | Def / Reb | 80 * | ||||||||||||||||||||||||
| Off-Ball Pest | HOF | Def / Reb | 90 * | ||||||||||||||||||||||||
| Open Looks | Bronze | Shooting | 54 ** | 58 ** | |||||||||||||||||||||||
| Open Looks | Silver | Shooting | 72 ** | 75 ** | |||||||||||||||||||||||
| Open Looks | Gold | Shooting | 86 ** | 88 ** | |||||||||||||||||||||||
| Open Looks | HOF | Shooting | 90 ** | 93 ** | |||||||||||||||||||||||
| Physical Handles | Bronze | Playmaking | 60 ***** | 60 ***** | 6 ft 10 | ||||||||||||||||||||||
| Physical Handles | Silver | Playmaking | 66 ***** | 63 ***** | 6 ft 10 | ||||||||||||||||||||||
| Physical Handles | Gold | Playmaking | 73 ***** | 73 ***** | 6 ft 10 | ||||||||||||||||||||||
| Physical Handles | HOF | Playmaking | 80 ***** | 83 ***** | 6 ft 10 | ||||||||||||||||||||||
| Pick Dodger | Bronze | Def / Reb | 74 * | 6 ft 10 | |||||||||||||||||||||||
| Pick Dodger | Silver | Def / Reb | 84 * | 6 ft 10 | |||||||||||||||||||||||
| Pick Dodger | Gold | Def / Reb | 91 * | 6 ft 10 | |||||||||||||||||||||||
| Pick Dodger | HOF | Def / Reb | 98 * | 6 ft 10 | |||||||||||||||||||||||
| Pogo Stick | Bronze | Def / Reb | 79 *** | 78 *** | 78 *** | 60 **** | 6 ft 04 | ||||||||||||||||||||
| Pogo Stick | Silver | Def / Reb | 85 *** | 81 *** | 81 *** | 68 **** | 6 ft 04 | ||||||||||||||||||||
| Pogo Stick | Gold | Def / Reb | 93 *** | 91 *** | 91 *** | 75 **** | 6 ft 04 | ||||||||||||||||||||
| Pogo Stick | HOF | Def / Reb | 97 *** | 97 *** | 97 *** | 83 **** | 6 ft 04 | ||||||||||||||||||||
| Post Lockdown | Bronze | Def / Reb | 74 ***** | 70 ***** | 6 ft 06 | ||||||||||||||||||||||
| Post Lockdown | Silver | Def / Reb | 82 ***** | 78 ***** | 6 ft 06 | ||||||||||||||||||||||
| Post Lockdown | Gold | Def / Reb | 88 ***** | 84 ***** | 6 ft 06 | ||||||||||||||||||||||
| Post Lockdown | HOF | Def / Reb | 96 ***** | 89 ***** | 6 ft 06 | ||||||||||||||||||||||
| Post Playmaker | Bronze | Playmaking | 55 *** | 57 **** | 58 *** | 6 ft 06 | |||||||||||||||||||||
| Post Playmaker | Silver | Playmaking | 67 *** | 74 **** | 69 *** | 6 ft 06 | |||||||||||||||||||||
| Post Playmaker | Gold | Playmaking | 79 *** | 83 **** | 78 *** | 6 ft 06 | |||||||||||||||||||||
| Post Playmaker | HOF | Playmaking | 88 *** | 90 **** | 88 *** | 6 ft 06 | |||||||||||||||||||||
| Post Spin Technician | Bronze | Finishing | 60 * | ||||||||||||||||||||||||
| Post Spin Technician | Silver | Finishing | 72 * | ||||||||||||||||||||||||
| Post Spin Technician | Gold | Finishing | 81 * | ||||||||||||||||||||||||
| Post Spin Technician | HOF | Finishing | 90 * | ||||||||||||||||||||||||
| Posterizer | Bronze | Finishing | 73 ***** | 70 ***** | |||||||||||||||||||||||
| Posterizer | Silver | Finishing | 86 ***** | 75 ***** | |||||||||||||||||||||||
| Posterizer | Gold | Finishing | 93 ***** | 80 ***** | |||||||||||||||||||||||
| Posterizer | HOF | Finishing | 99 ***** | 85 ***** | |||||||||||||||||||||||
| Precision Dunker | Bronze | Finishing | 71 ** | 71 ** | |||||||||||||||||||||||
| Precision Dunker | Silver | Finishing | 83 ** | 81 ** | |||||||||||||||||||||||
| Precision Dunker | Gold | Finishing | 90 ** | 90 ** | |||||||||||||||||||||||
| Precision Dunker | HOF | Finishing | 97 ** | 96 ** | |||||||||||||||||||||||
| Post Fade Phenom | Bronze | Finishing | 65 *** | 59 **** | 61 *** | ||||||||||||||||||||||
| Post Fade Phenom | Silver | Finishing | 77 *** | 65 **** | 71 *** | ||||||||||||||||||||||
| Post Fade Phenom | Gold | Finishing | 86 *** | 75 **** | 79 *** | ||||||||||||||||||||||
| Post Fade Phenom | HOF | Finishing | 93 *** | 85 **** | 86 *** | ||||||||||||||||||||||
| Pro Touch | Bronze | Finishing | 51 ** | 51 ** | |||||||||||||||||||||||
| Pro Touch | Silver | Finishing | 60 ** | 68 ** | |||||||||||||||||||||||
| Pro Touch | Gold | Finishing | 70 ** | 77 ** | |||||||||||||||||||||||
| Pro Touch | HOF | Finishing | 80 ** | 88 ** | |||||||||||||||||||||||
| Rebound Chaser | Bronze | Def / Reb | 60 ** | 60 ** | |||||||||||||||||||||||
| Rebound Chaser | Silver | Def / Reb | 83 ** | 83 ** | |||||||||||||||||||||||
| Rebound Chaser | Gold | Def / Reb | 92 ** | 92 ** | |||||||||||||||||||||||
| Rebound Chaser | HOF | Def / Reb | 99 ** | 99 ** | |||||||||||||||||||||||
| Relay Passer | Bronze | Playmaking | 60 * | ||||||||||||||||||||||||
| Relay Passer | Silver | Playmaking | 76 * | ||||||||||||||||||||||||
| Relay Passer | Gold | Playmaking | 89 * | ||||||||||||||||||||||||
| Relay Passer | HOF | Playmaking | 95 * | ||||||||||||||||||||||||
| Right Stick Ripper | Bronze | Def / Reb | 70 * | 7 ft 00 | |||||||||||||||||||||||
| Right Stick Ripper | Silver | Def / Reb | 84 * | 7 ft 00 | |||||||||||||||||||||||
| Right Stick Ripper | Gold | Def / Reb | 90 * | 7 ft 00 | |||||||||||||||||||||||
| Right Stick Ripper | HOF | Def / Reb | 96 * | 7 ft 00 | |||||||||||||||||||||||
| Rise Up | Bronze | Finishing | 72 ***** | 60 ***** | 6 ft 04 | ||||||||||||||||||||||
| Rise Up | Silver | Finishing | 81 ***** | 63 ***** | 6 ft 04 | ||||||||||||||||||||||
| Rise Up | Gold | Finishing | 90 ***** | 67 ***** | 6 ft 04 | ||||||||||||||||||||||
| Rise Up | HOF | Finishing | 98 ***** | 70 ***** | 6 ft 04 | ||||||||||||||||||||||
| Scooper | Bronze | Finishing | 61 * | ||||||||||||||||||||||||
| Scooper | Silver | Finishing | 68 * | ||||||||||||||||||||||||
| Scooper | Gold | Finishing | 77 * | ||||||||||||||||||||||||
| Scooper | HOF | Finishing | 88 * | ||||||||||||||||||||||||
| Slithery | Bronze | Finishing | 68 ** | 70 ** | |||||||||||||||||||||||
| Slithery | Silver | Finishing | 80 ** | 82 ** | |||||||||||||||||||||||
| Slithery | Gold | Finishing | 91 ** | 93 ** | |||||||||||||||||||||||
| Slithery | HOF | Finishing | 97 ** | 94 ** | |||||||||||||||||||||||
| Slippery Off-Ball | Bronze | Shooting | 6 ft 09 | ||||||||||||||||||||||||
| Slippery Off-Ball | Silver | Shooting | 6 ft 09 | ||||||||||||||||||||||||
| Slippery Off-Ball | Gold | Shooting | 6 ft 09 | ||||||||||||||||||||||||
| Slippery Off-Ball | HOF | Shooting | 6 ft 09 | ||||||||||||||||||||||||
| Space Creator | Bronze | Shooting | 64 ** | 65 ** | 6 ft 11 | ||||||||||||||||||||||
| Space Creator | Silver | Shooting | 76 ** | 78 ** | 6 ft 11 | ||||||||||||||||||||||
| Space Creator | Gold | Shooting | 88 ** | 87 ** | 6 ft 11 | ||||||||||||||||||||||
| Space Creator | HOF | Shooting | 96 ** | 94 ** | 6 ft 11 | ||||||||||||||||||||||
| Special Delivery | Bronze | Playmaking | 69 * | ||||||||||||||||||||||||
| Special Delivery | Silver | Playmaking | 75 * | ||||||||||||||||||||||||
| Special Delivery | Gold | Playmaking | 83 * | ||||||||||||||||||||||||
| Special Delivery | HOF | Playmaking | 91 * | ||||||||||||||||||||||||
| Speed Booster | Bronze | Playmaking | 76 ***** | 72 ***** | 75 *** | 79 *** | 6 ft 09 | ||||||||||||||||||||
| Speed Booster | Silver | Playmaking | 81 ***** | 75 ***** | 81 *** | 83 *** | 6 ft 09 | ||||||||||||||||||||
| Speed Booster | Gold | Playmaking | 92 ***** | 83 ***** | 86 *** | 87 *** | 6 ft 09 | ||||||||||||||||||||
| Speed Booster | HOF | Playmaking | 95 ***** | 91 ***** | 92 *** | 93 *** | 6 ft 09 | ||||||||||||||||||||
| Spin Cycle | Bronze | Finishing | 55 ** | 56 ** | |||||||||||||||||||||||
| Spin Cycle | Silver | Finishing | 64 ** | 69 ** | |||||||||||||||||||||||
| Spin Cycle | Gold | Finishing | 70 ** | 75 ** | |||||||||||||||||||||||
| Spin Cycle | HOF | Finishing | 82 ** | 85 ** | |||||||||||||||||||||||
| Spot Finder | Bronze | Shooting | 55 *** | 55 *** | 60 *** | 45 **** | |||||||||||||||||||||
| Spot Finder | Silver | Shooting | 70 *** | 69 *** | 75 *** | 68 **** | |||||||||||||||||||||
| Spot Finder | Gold | Shooting | 80 *** | 79 *** | 86 *** | 80 **** | |||||||||||||||||||||
| Spot Finder | HOF | Shooting | 91 *** | 90 *** | 93 *** | 93 **** | |||||||||||||||||||||
| Touch Passer | Bronze | Playmaking | 74 * | ||||||||||||||||||||||||
| Touch Passer | Silver | Playmaking | 82 * | ||||||||||||||||||||||||
| Touch Passer | Gold | Playmaking | 90 * | ||||||||||||||||||||||||
| Touch Passer | HOF | Playmaking | 95 * | ||||||||||||||||||||||||
| Triple Strike | Bronze | Playmaking | 57 ***** | 41 ***** | 42 ***** | 6 ft 11 | |||||||||||||||||||||
| Triple Strike | Silver | Playmaking | 68 ***** | 66 ***** | 65 ***** | 6 ft 11 | |||||||||||||||||||||
| Triple Strike | Gold | Playmaking | 80 ***** | 77 ***** | 75 ***** | 6 ft 11 | |||||||||||||||||||||
| Triple Strike | HOF | Playmaking | 90 ***** | 89 ***** | 85 ***** | 6 ft 11 | |||||||||||||||||||||
| Two Step | Bronze | Finishing | 60 ** | 63 ** | |||||||||||||||||||||||
| Two Step | Silver | Finishing | 68 ** | 70 ** | |||||||||||||||||||||||
| Two Step | Gold | Finishing | 74 ** | 78 ** | |||||||||||||||||||||||
| Two Step | HOF | Finishing | 83 ** | 86 ** | |||||||||||||||||||||||
| Unpluckable | Bronze | Playmaking | 57 ** | 70 ** | |||||||||||||||||||||||
| Unpluckable | Silver | Playmaking | 68 ** | 80 ** | |||||||||||||||||||||||
| Unpluckable | Gold | Playmaking | 80 ** | 92 ** | |||||||||||||||||||||||
| Unpluckable | HOF | Playmaking | 98 * | ||||||||||||||||||||||||
| Whistle | Bronze | Finishing | 73 ** | 74 ** | 75 ** | 73 ** | 77 ** | ||||||||||||||||||||
| Whistle | Silver | Finishing | 84 ** | 85 ** | 86 ** | 85 ** | 86 ** | ||||||||||||||||||||
| Whistle | Gold | Finishing | 92 ** | 95 ** | 95 ** | 93 ** | 94 ** | ||||||||||||||||||||
| Whistle | HOF | Finishing | 99 ** | 99 ** | 99 ** | 99 ** | 99 ** | ||||||||||||||||||||
| Work Horse | Bronze | Def / Reb | 65 *** | 72 *** | 89 **** | ||||||||||||||||||||||
| Work Horse | Silver | Def / Reb | 72 *** | 79 *** | 92 **** | ||||||||||||||||||||||
| Work Horse | Gold | Def / Reb | 82 *** | 86 *** | 95 **** | ||||||||||||||||||||||
| Work Horse | HOF | Def / Reb | 93 *** | 94 *** | 99 **** |
NBA 2K24 Badge Descriptions
Shooting Badges
| Badge | Description |
|---|---|
| Agent 3 | Improves the ability to make pull-up or spin shots from three point range |
| Blinders | Jump shots taken with a defender closing out in their peripheral vision will suffer a lower penalty |
| Catch and Shoot | For a short time after receiving a pass, the receiver's outside shooting attributes get a significant boost |
| Claymore | Increases the ability to knock down perimeter shots when spotting up patiently |
| Comeback Kid | Boosts shooter's mid-range and three-point abilities when trailing in a game |
| Corner Specialist | Deep range shots taken along the baseline of the court receive a boost, whether it is off the dribble or off a catch |
| Deadeye | Jump shots taken with a defender closing out receive less of a penalty from a shot contest |
| Free Points | In clutch moments, knocking down free throws with the game on the line is improved with Free Points. |
| Green Machine | Gives an additional shot boost when consecutively achieving excellent releases on jump shots |
| Guard Up | Increases the ability to make jump shots when defenders fail to properly contest |
| Limitless Range | Extends the range from which a player can shoot three-pointers effectively from deep |
| Middy Magician | Boosts the effectiveness of pullups, spin shots, and fadeaways from the mid-range area |
| Open Looks | As a way to encourage sudden opportunities, Open Looks will enhance a player’s ability to make wide-open jumpers. |
| Post-Fade Phenom | Similar to Hook Specialist, Post-Fade Phenom will allow a player to make post-fades and hop shots out of the post at a higher clip. |
| Slippery Off-Ball | When attempting to get open off screens, the player more effectively navigates through traffic |
| Space Creator | Increases a player's to both hit shots after creating space from the defender, as well as cross up an opponent on step-back moves |
| Spot Finder | By utilizing the “Get Open” mechanic (R2 or Right Trigger Tap), Spot Finder allows players to receive a speed boost off-the-ball to get to an open space, with a raised chance of knocking down the shot off the ensuing catch. |
Playmaking Badges
| Badge | Description |
|---|---|
| Ankle Breaker | When performing stepbacks and other certain moves, the defender stumbles or falls more frequently when biting the wrong way |
| Bail Out | Passing out of a jump shot or layup yields fewer errant passes than normal. Additionally, helps passing out of double teams |
| Blow-By | Quicker ball-handlers receive boosts in body-up interactions with defenders when Blow-By is equipped. |
| Break Starter | After grabbing a defensive board, deep outlet passes made up the court are more accurate. Passes must be made quickly following the defensive rebound |
| Dimer | When in the half-court, passes by Dimers to open shooters yield a shot percentage boost |
| Handles For Days | A player takes less of an energy hit when performing consecutive dribble moves, allowing them to chain together combos quicker and for longer periods of time |
| Hyperdrive | Increases the speed at which a player can perform moving dribble moves as the attack down the court |
| Killer Combos | Improves a player's ability to chain together efficient dribble moves when sizing up their opponent |
| Mismatch Expert | Improves the players ability to beat taller defenders off the dribble in one-on-one situations when they're switched onto them |
| Needle Threader | When passing through a tight window between defenders, a boost is given to the player’s passing ability |
| Physical Handles | During physical body-up interactions, players with Physical Handles have a higher chance of winning the outcome following a dribble move. |
| Post Playmaker | When passing our of the post or after an offensive rebound, receivers are given a shot boost |
| Relay Passer | A hockey assist badge, Relay Passer provides a boost to shooters in a pass-to-assist situation. |
| Special Delivery | Increases alley-oop throw success and shot chance for receivers after a flashy pass. Additionally, it enables the ability to throw alley-oops off the backboard |
| Speed Booster | A perimeter-only quick first step badge, Speed Booster will allow for quicker launches when coming from a stand-still dribble situation. |
| Touch Passer | Players who quickly move the ball upon receiving it will get faster pass animations with Touch Passer. |
| Triple Strike | Players excel with triple threat launches and jukes at a higher rate with Triple Strike. |
| Unpluckable | Defenders have a tougher time poking the ball free with their steal attempts |
Finishing Badges
| Badge | Description |
|---|---|
| Acrobat | Hop step, euro-step, cradle, reverse, and change shot layup attempts receive a boost. Additionally, the ability to beat defenders with gathers is improved |
| Aerial Wizard | Increases the ability to finish an alley-oop from a teammate, or putback a finish off an offensive rebound |
| Backdown Punisher | Allow players to have more success than normal when backing down a defender in the paint while posting up |
| Big Driver | Increases the chances of a blow-by when attacking off the dribble in either the mid-range or painted area. |
| Bulldozer | A mix of a scoring and a ball-handling badge, think of this as Bully version 2.0 with elements of the old Clamp Breaker. Bulldozer improves the player’s ability to push through physical body-ups and finish with physicality around the rim. |
| Bunny | Hop step layups and dunks receive an increased shot chance with Bunny. |
| Dream Shake | Post move fakes have a higher chance of stunning a defender. Also, shot attempts following post fakes, shimmies, and shot fakes have an increased shot percentage |
| Dropstepper | Allows for more success when attempting post dropsteps and hop steps, in addition to protecting the ball better, while performing these moves in the post |
| Fast Twitch | Speeds up the ability to get standing layups or dunks off before the defense has time to contest |
| Fearless Finisher | Strengthens a player's ability to absorb contact and still finish. Also reduces the amount of energy lost from contact layups |
| Float Game | A player’s ability to make floaters and runners while attacking the basket is improved with Float Game. |
| Giant Slayer | Boosts the shot percentage for a layup attempt when mismatched against a taller defender and reduces the possibility of getting blocked |
| Hook Specialist | No love lost for post-play aficionados. Brought back from the dead, Hook Specialist increases a player’s ability to make hook shots out of the post. |
| Masher | Improves a player's ability to finish well around the rim, especially over smaller defenders |
| Post Spin Technician | Attempting to do post spins or drives results in more effective moves, and less of a chance to be stripped |
| Posterizer | Increases the chances of throwing down a dunk on your defender |
| Precision Dunker | Those who utilize the skill dunk mechanic will receive an improved chance of flushing their dunk attempt with Precision Dunker. |
| Pro Touch | Gives an extra shot boost for having slight early, slightly late, or excellent shot timing on layups. Layup timing must be turned on |
| Rise Up | Increases the likelihood of dunking or posterizing your opponent when standing in the painted area |
| Scooper | Quick scoop layup shot chances are improved with the new Scooper badge. |
| Slithery | Increases a player's ability to slide through traffic, protect the ball from being stolen, and avoid contact during gathers and finishes at the rim |
| Spin Cycle | Drives finished with a spin layup or dunk will receive an increased shot chance ability thanks to Spin Cycle. |
| Two Step | Cradle and Euro step layups and dunks receive a shot boost with Two Step. |
| Whistle | Creating contact and getting to the free throw line when attacking the rim or shooting a jump shot is improved with the new Whistle badge. |
Defense / Rebounding Badges
| Badge | Description |
|---|---|
| 94 Feet | Players with 94 Feet receive fewer body-up stamina hits and improved body-up wins when pressing full court |
| Anchor | Increases a player's ability to block shots and protect the rim at a high level |
| Ankle Braces | Lowers the likelihood of getting ankle-broken by opposing dribble moves |
| Boxout Beast | Helps rebounders win boxout battles on both offense and defensive rebounding situations |
| Brick Wall | Increases the effectiveness of screens, is tough to backdown in the post, and drains energy from opponents on physical contact |
| Challenger | Improves the effectiveness of well-timed contests against perimeter shooters |
| Chase Down Artist | Boosts the speed and leaping ability of a player when he is chasing down an offensive player in anticipation of a block attempt |
| Clamps | Defenders have access to quicker cut off moves and are more successful when bumping or hip riding the ball handler |
| Fast Feet | It wouldn’t be a fair game if only offensive players received speed boosts. Fast Feet can be looked at as a “quick first step” badge for defenders, allowing defensive specialists to stay in front of shifty ball-handlers. |
| Glove | Increases the ability to successfully steal from ball-handlers |
| Interceptor | The frequency of successfully tipped or intercepted passes greatly increases |
| Immovable Enforcer | A direct counter to Bulldozer, Immovable Enforcer allows defenders to win physical matchups when it comes to body-ups and contact layups. |
| Off-Ball Pest | Makes players more difficult to get past when playing off-ball, as the can grab and hold their matchup and don’t get their ankles broken as often |
| Pick Dodger | Improves a player’s ability to navigate through and around screens while on defense. At the Hall of Fame level, can blow through screens in the park or blacktop |
| Pogo Stick | Allows players to quickly go back up for another jump upon landing. This could be after a rebound, block attempt, or even jumpshot |
| Post Lockdown | Strengthens a player's ability to effectively defend moves in the post, with an increased chance at stripping the opponent |
| Rebound Chaser | Improves a player's ability to track down rebounds from farther distances than normal |
| Right Stick Ripper | Those who utilize the right-stick steal mechanic will receive a boost on steal attempts with Right Stick Ripper. |
| Work Horse | Increases a player's speed and ability to get loose balls over the opponent |
Badge Perks
Badge Perks are prizes that provide various benefits to the progression of individual badges. The Badge Perks page consists of “slots” that the user can fill in when unlocked. There are four slots per perk, with each slot representing a different badge tier. A badge can only have one badge perk applied at a time.
Here is the list of Badge Perks:
- Overdrive – Increases badge level progression in games
- Immunity – Slows down badge level regression in games
- Drill Savant – Increases badge level progression in Team Practice Facility
- Scholar – A risk/reward perk that gives a significant increase in badge level progression for PvP games finished with a high Teammate Grade. However, it comes with risk: you will receive no progression for the badge if you do not finish with a high Teammate Grade. This is a rotational season prize.
- Winner’s Circle – A risk/reward perk that gives an added boost in badge level progression for PvP games that result in a win for the user. However, you will receive zero progression for the badge if you lose the game. This is a rotational season prize.
- High-Risk – A risk/reward perk increases your badge level progression for PvP games with badge usage but accelerated regression with lack of usage. This is a rotational season prize.
How to Unlock All Badge Perks in NBA 2K24
Here’s how to unlock all Badge Perks in NBA 2K24.
Overdrive
-
- C-Tier Badge: Talk to Josh Giddey at The Point after reaching Silver level with multiple badges.
- B-Tier Badge: Complete 5 NBA, 10 Pro-Am/REC, or 20 City games with Overdrive equipped to a C-Tier badge. Then, talk to Josh Giddey.
- A-Tier Badge: Complete 7 NBA, 12 Pro-Am/REC, or 30 City games with Overdrive equipped to a B-Tier badge. Then, talk to Josh Giddey.
<li”>S-Tier Badge: Complete 12 NBA, 20 Pro-Am/REC, or 40 City games with Overdrive equipped to an A-Tier badge. Then, talk to Josh Giddey.
Immunity
- C-Tier Badge: Reach Gold level with a badge for the first time. Then, talk to Cade Cunningham.
- B-Tier Badge: Complete 5 NBA,10 Pro-Am/REC, or 20 City games with Immunity equipped to a C-Tier badge. Then, talk to Cade Cunningham.
- A-Tier Badge: Complete 7 NBA,12 Pro-Am/REC, or 30 City games with Immunity equipped to a B-Tier badge. Then, talk to Cade Cunningham.
- S-Tier Badge: Complete 12 NBA, 20 Pro-Am/REC, or 40 City games with Immunity equipped to a A-Tier badge. Then, talk to Cade Cunningham.
Drill Savant
- C-Tier Badge: Have two badges active at the Gold level or higher. Then, talk to Red Thompson.
- B-Tier Badge: Complete 5 NBA,10 Pro-Am/REC, or 20 City games with Drill Savant equipped to a C-Tier badge. Then, talk to Red Thompson.
- A-Tier Badge: Complete 7 NBA,12 Pro-Am/REC, or 30 City games with Drill Savant equipped to a B-Tier badge. Then, talk to Red Thompson.
- S-Tier Badge: Complete 12 NBA, 20 Pro-Am/REC, or 40 City games with Drill Savant equipped to a A-Tier badge. Then, talk to Red Thompson.
Scholar
- C-Tier Badge: Reach Season Level 9.
- B-Tier Badge: Reach Season Level 18.
- A-Tier Badge: Reach Season Level 29.
- S-Tier Badge: Reach Season Level 38.
Performance Multipliers
Performance Multipliers are prizes that, unlike Badge Perks, provide benefits to all of your equipped badges at once, so long as challenges from the multipliers are met in their respective modes. Each of the three Performance Multipliers has four versions—: NBA, City, The REC, and Pro-Am—for a total of 12 multipliers.
- Grade A Student – In games finished with a high Teammate Grade, badge level progression is accelerated for all equipped badges.
- Winner Takes All – In games finished with a win, badge level progression is accelerated for all equipped badges.
- Up for the Challenge – In games played against tough opponents, badge level progression is accelerated for all equipped badges.
NBA 2K24 Takeover Guide
Takeovers are special abilities that are activated for your MyPLAYER in real-time during games. Basically, like a player getting hot in real basketball. Takeovers were revamped for NBA 2K24 to activate from within the game instead of last year’s method of assigning it to your MyPLAYER during the create a build process.
List of Takeovers
![]()
- Finishing: Checkered flag icon (A/X)
- Shooting: Sniper icon (X/Square)
- Playmaking: Basketball with trail icon (Y/Triangle)
- Defensive/Rebounding: Shield icon (LB/L1)
- Physicals: Hand holding a weight icon (RB/R1)
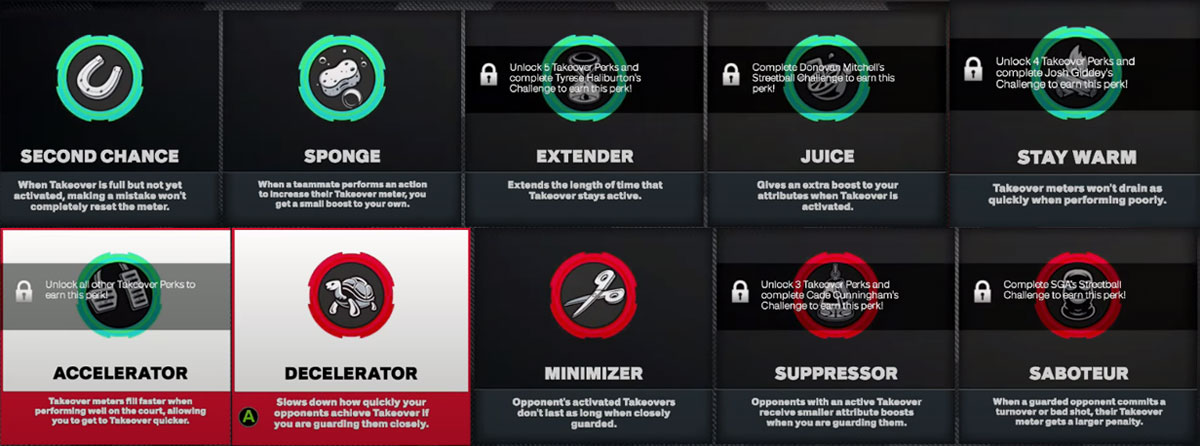
Takeover Perks List & How to Earn Them
| Takeover Perk | Description | How to Unlock |
|---|---|---|
| Decelerator | Slows down how quickly your opponents achieve Takeover if you are guarding them closely. | Play in both a weekday and weekend Brickley Scrimmage to earn this perk! |
| Minimizer | Opponent’s activated Takeovers don’t last as long when closely guarded. | Perfect any of the 'Art of Shooting' drills to earn this perk! |
| Suppressor | Opponents with an active Takeover receive smaller attribute boosts when you are guarding them. | Unlock 3 Takeover Perks and complete Cade Cunningham's Challenge to earn this perk! |
| Saboteur | When a guarded opponent commits a turnover or bad shot, their Takeover meter gets a larger penalty. | Complete SGA's Streetball Challenge to earn this perk! |
| Second Chance | When Takeover is full but not yet activated, making a mistake won’t completely reset the meter. | Complete Chris Brickley's Scrimmage Challenge to earn this perk! |
| Sponge | When a teammate performs an action to increase their Takeover meter, you get a small boost to your own. | Recruit 3 Streetball Bosses or complete Red Thompson's Challenge to earn this perk! |
| Extender | Extends the length of time that Takeover stays active. | Unlock 5 Takeover Perks and complete Tyrese Haliburton's Challenge to earn this perk! |
| Juice | Gives an extra boost to your attributes when Takeover is activated. | Complete Donovan Mitchell's Streetball Challenge to earn this perk! |
| Stay Warm | Takeover meters won’t drain as quickly when performing poorly. | Unlock 4 Takeover Perks and complete Josh GIddey's Challenge to earn this perk! |
| Accelerator | Takeover meters fill faster when performing well on the court, allowing you to get Takeover quicker. | Unlock all other Takeover Perks to earn this perk! |
Note: 3v3 Brickley scrimmages are available during the week (Mon-Thu) while 5v5 Brickley scrimmages run on the weekends (Fri-Sun). Also, the Art of Shooting “session” is available once per week.
How to Unlock Mamba Mentality
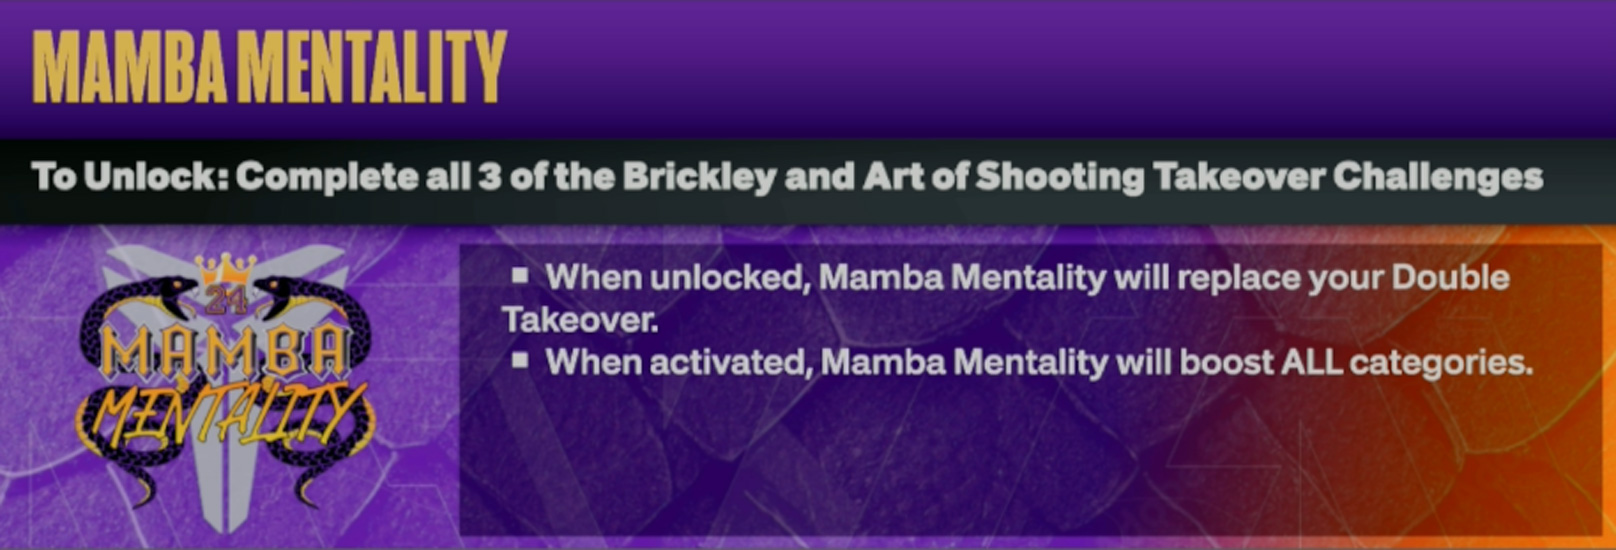 Here’s how to unlock the Mamba Mentality in NBA 2k24:
- Complete all 3 of the Brickley and ‘Art of Shooting’ Takeover Challenges
Rewards
- When unlocked, Mamba Mentality will relace your Double Takeover
- When activated, Mamba Mentality will boost ALL categories


