


Here are the most efficient NBA 2K19 builds per position according to the custom efficiency formula we developed to calculate builds with the highest efficiency.
Efficiency formula is calculated and made up by the following factors:
- Default weight
- Default wingspan
- Attribute efficiency
- Badge efficiency
- Badge strength (i.e. Posterizer is rated higher than Flashy Passer)
*Note: The efficiency formula doesn’t yet rank “Attribute Strength”, which could somewhat affect rankings.
*Note: When creating your player, also consider other key factors like your play style preference, what game mode you play the most, height, weight, wingspan, team needs, etc.
More NBA 2K19 Player Creation Resources:
- Compare attributes, badges, and builds with the #1 NBA 2K19 MyPLAYER Builder
- Also, check out the NBA 2K19 Best Builds tool. This is a #2Kcommunity crowdsourced tool to add and vote up the best builds in the game. Add build details, highlights, tips, pros & cons, and more. Add Your Build
1Point Guard

- Archetype: Post Scoring Shot Creator
- Height: 6’4
- Attribute Efficiency 95.37%
- Badge Efficiency: 98.92%
- OVR efficiency: 98.96%
2Shooting Guard
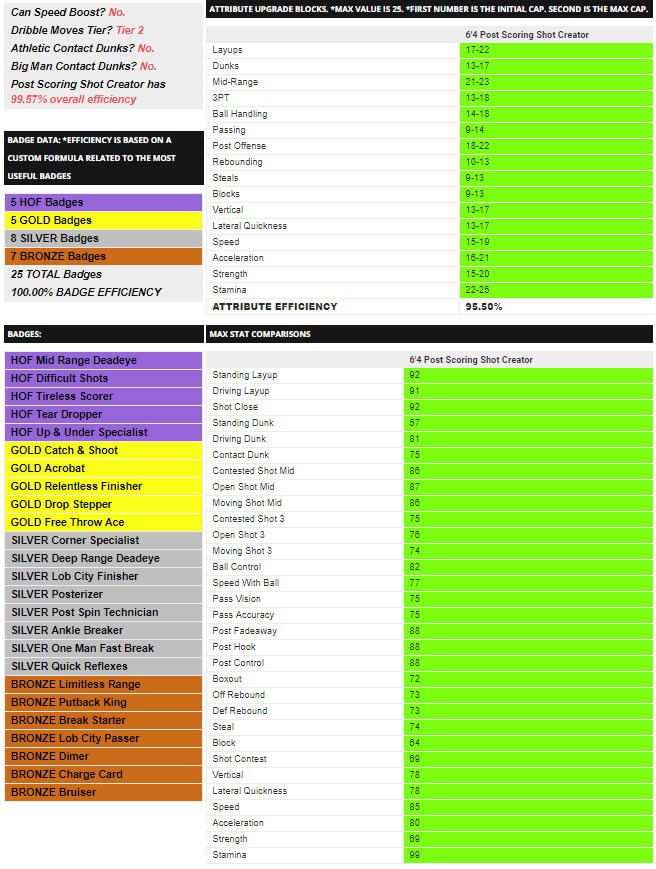
- Archetype: Post Scoring Shot Creator
- Height: 6’4
- Attribute Efficiency 95.50%
- Badge Efficiency: 100%
- OVR efficiency: 99.57%
3Small Forward
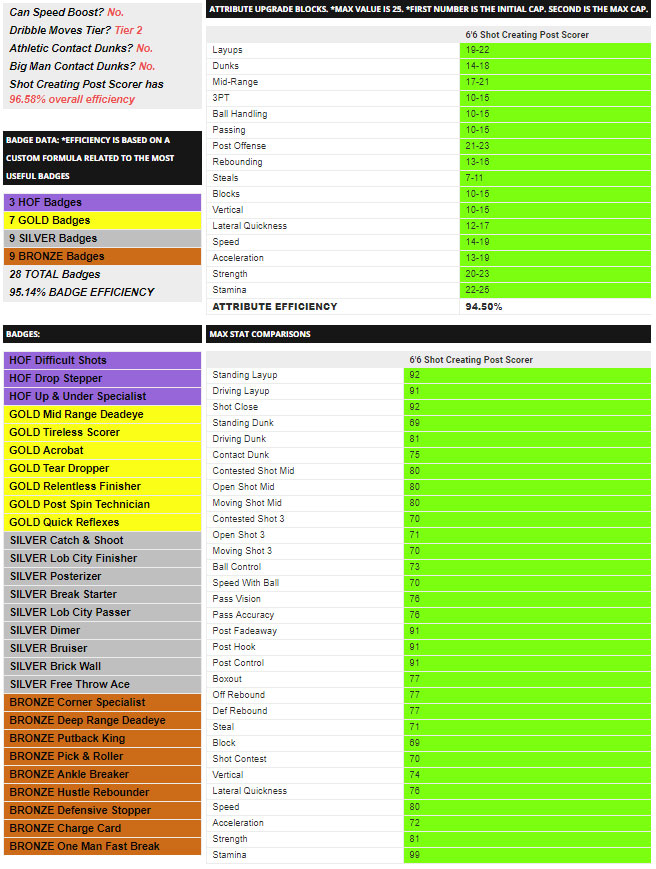
- Archetype: Post Scoring Shot Creator
- Height: 6’6
- Attribute Efficiency 94.50%
- Badge Efficiency: 95.14%
- OVR efficiency: 96.58%
4Power Forward
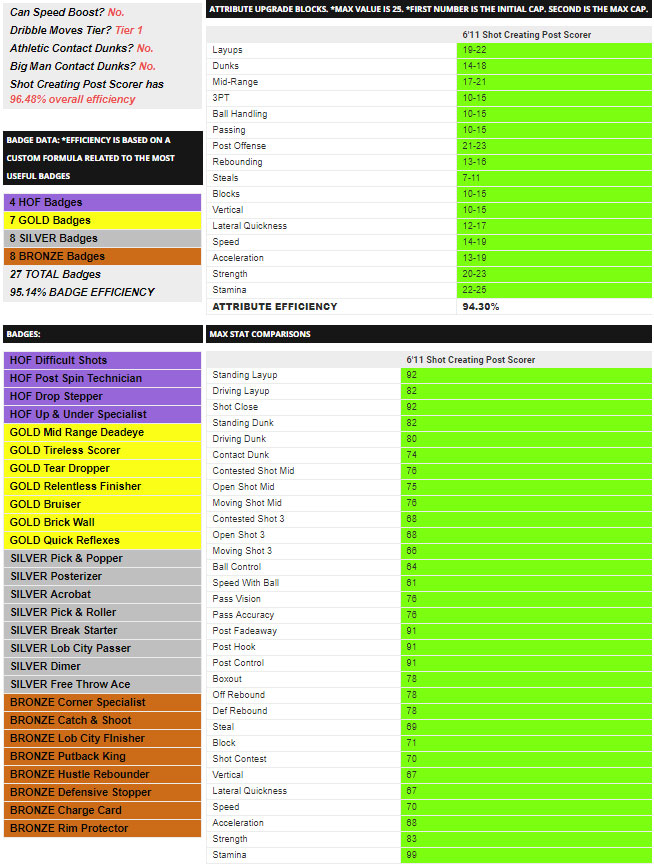
- Archetype: Shot Creating Post Scorer
- Height: 6’11
- Attribute Efficiency 94.30%
- Badge Efficiency: 95.14%
- OVR efficiency: 96.48%
5Center
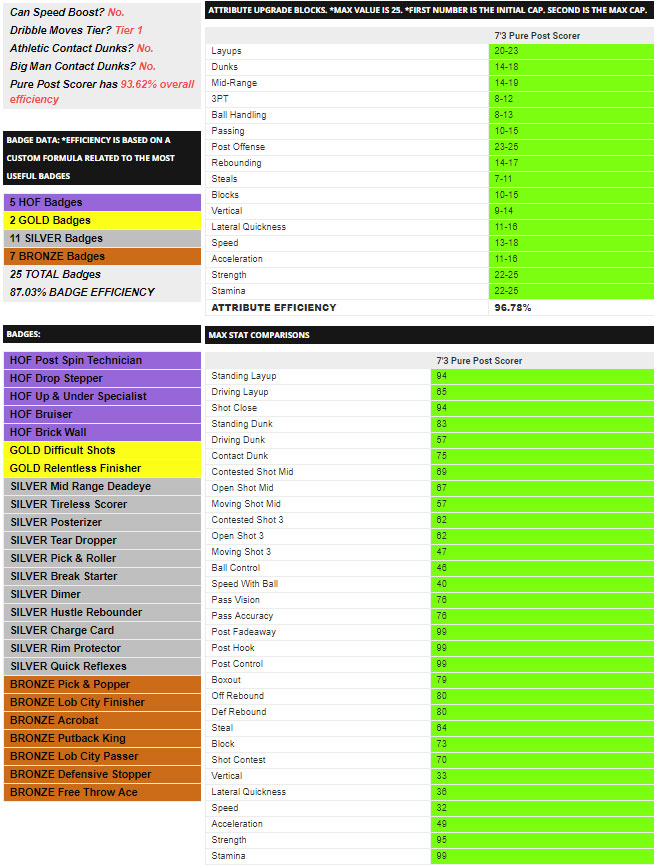
- Archetype: Pure Post Scorer
- Height: 7’3
- Attribute Efficiency: 96.78%
- Badge Efficiency: 87.03%
- OVR efficiency: 93.62%


")


7”3 pure post shot will destroy my park and mycareer ?
A shot creating athletic finisher is the best to me
That’s where Two-Way Shot Creatora come in
So go ahead and spend that $50 and once you realize that build is trash and not what you expected, start over and spend another $50 right lol lol lol
wtf
If you make any build under 6’6 you’re useless on defence unless you’re a lock
Both above comments are wrong.
SG most efficient build should be Passing + Ball Handling and the 3pt. Shooting
In all honesty, these builds are not the most efficient and are pretty terrible